
What Is Go High Level (GHL)?
Go High Level (GHL) is an all-in-one CRM and marketing automation platform designed to help wellness practitioners streamline client communication, automate follow-up, and manage their sales and engagement workflows. Whether you're nurturing leads or sending marketing emails, GHL brings it all under one roof.
What the GetHealthy + GHL Integration Does
Our current integration with GHL allows your eCommerce store activity to directly trigger workflows and update client records inside your GHL account—creating a seamless connection between your online store and your automated marketing engine.
Current Capabilities:
-
Trigger on Order Creation: When a new order is placed on your store, a signal (called a “track event”) is sent to GHL. This allows you to create campaigns based on new orders.
-
Trigger on Customer Creation: When a new customer is created in your store, we match the email with your GHL contacts or create a new one.
-
Tip: Create a Welcome Email Series based on new sign ups in your store.
-
-
Contact Sync: We identify the customer and link the data to their GHL contact ID.
-
Custom Workflow Actions: You can use these triggers inside GHL to build workflows—for example, send a thank-you email, notify your team, or follow up on specific items purchased.
Note: We do not store order data inside GHL. Workflow automations must be configured within GHL to use this integration effectively.
How to Get Started
Getting connected is quick and simple. If you do not have a High Level account, you can create one here. Just be sure to come back to this page to connect your store when you're done!
-
Visit your admin settings.
Go to your name on the top right of the screen, the click "Settings" and find the "Integrations" section. Click Go High Level.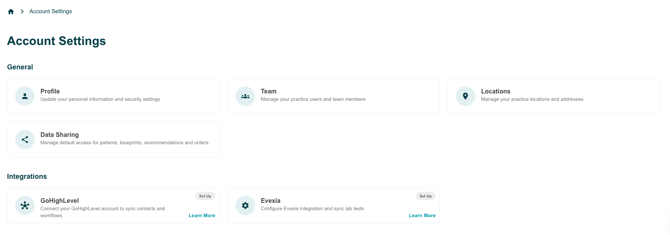
-
Continue through the prompts.
You will be prompted to login to your account and connect the integration. - Once connected, you will see the green "Connected" flag on the right, and the integration is toggled on.
